A Parent's Guide to the OnShelf 'Library' Page
The Library page in your OnShelf portal is a powerful tool that allows you to browse your child's complete school library catalog (including both the main library and individual classroom libraries). Most importantly, it gives you direct control to manage access to specific books for each of your children, ensuring a safe and appropriate reading experience.
1. Key Features of the Library Dashboard
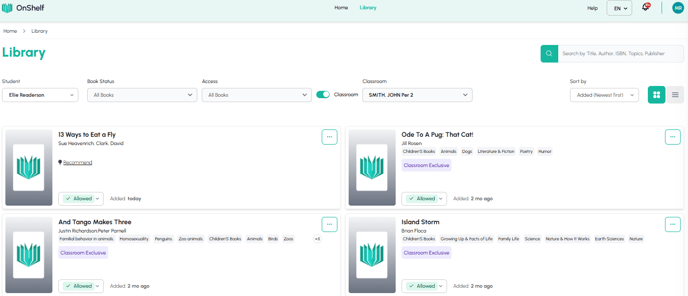
The main Library page is your central hub for browsing and filtering the catalog. The information displayed is dynamic and changes based on the child you have selected.
Student Selector
At the top-left of the page, you can select which child's library view you want to manage. Clicking the student's name (e.g., "Ellie Readerson") will show a dropdown list of all your children. Any filters you apply or access changes you make will apply only to the child you have selected.
Search and Sort
-
Search Bar: Located at the top-right, this bar allows you to search the entire catalog by "Title, Author, ISBN, Topics, Publisher."
-
Sort By: You can sort the library results alphabetically (A-Z) or by other criteria.
Filtering the Catalog
You have several powerful filters to narrow down the book list:
-
Book Status: Filter by books that are
Checked Out,Recommended, etc. -
Access: This is a key filter. You can view
All Books, only books you haveAllowed, or only books you have set toAccess limited. -
Classroom Library Toggle: By default, you see the main school library. If you click the "Classroom" toggle, you can then use a dropdown menu to select a specific teacher's classroom (e.g., "SMITH, JOHN PER 1") and see only the books available in that room.
2. How to Manage Access to a Book (Grant or Limit)
You have direct control over which books your selected child can check out. The system shows the status on each book card (e.g., a green "Allowed" tag).
Here is the step-by-step process to limit a child's access to a specific book.
Step 1: Find the Book
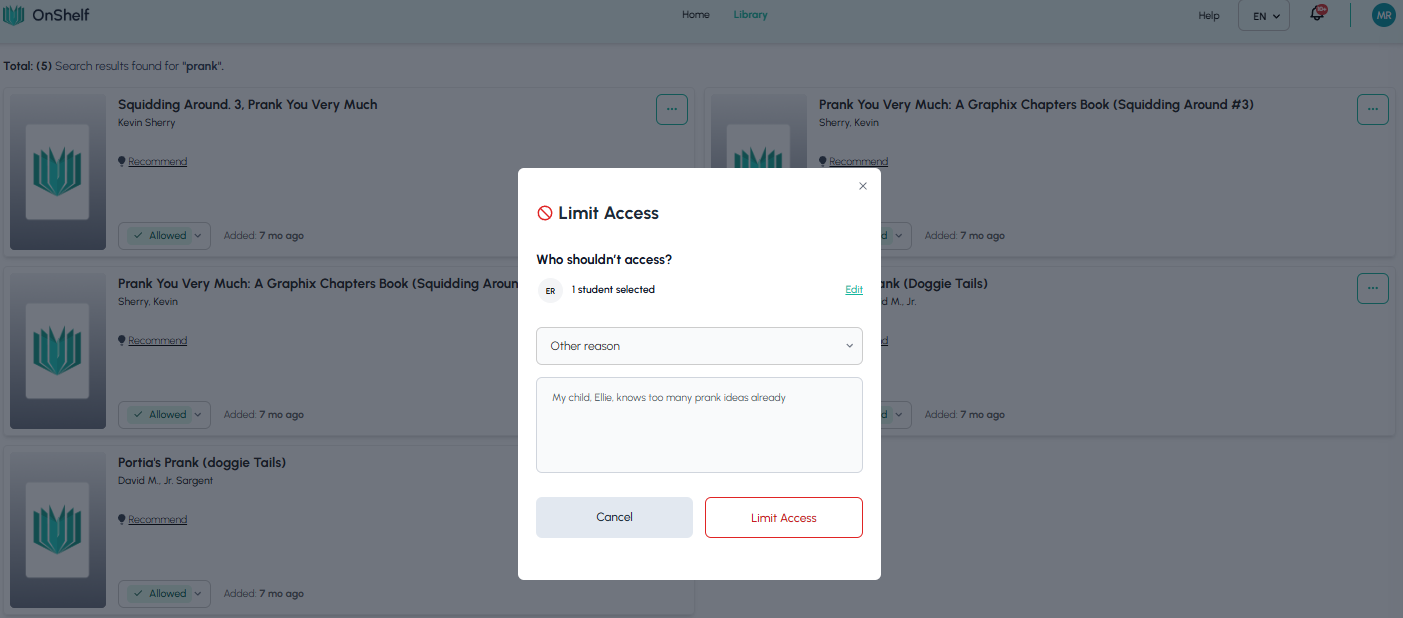
Use the Search Bar or the filters to locate the book you wish to review (e.g., search by a topic by entering "prank").
Step 2: Open the Access Menu
Once you find the book, click on the green "Allowed" button or the three-dot menu on the book's card. This will open a small menu.
Step 3: Select "Access limited"
From the menu, click on the red Access limited option.
Step 4: Complete the "Limit Access" Form
A pop-up window titled "Limit Access" will appear. You must provide a reason for the limitation.
-
Who shouldn't access? The form confirms which student you are limiting access for (e.g., "1 student selected").
-
Reason: You can select a pre-set reason, such as:
-
I need to know more about this book first -
Does not align with my morals -
Not age appropriate -
Other
-
-
Additional Notes: You can add your own specific comments in the text box.
-
Confirm: Click the red "Limit Access" button to save your change.
Step 5: View the Updated Status
After you submit, the page will reload. You will see two confirmations:
-
Pop-up: A notification will appear in the bottom-right corner stating, "Access Limited. This book will not be allowed to be checked out from the library by your student(s)." (02:53)
-
Book Card: The book card you just changed will now display a red "Access limited" tag (03:08), giving you a clear visual confirmation.
To grant access again, you would simply repeat this process, but select "Grant Access" from the menu instead.
3. Reviewing Book Details for All Children
If you want to see a book's details without immediately changing its status, simply click on the book's cover or title.
This will take you to the Book Details Page. On this page, you can read an overview of the book, see its publisher and ISBN, and, most helpfully, you can see the current access status for all of your children at a glance.